





Create Bespoke Built-In Shelves Without the Heavy Price Tag
Built-in shelving can turn an awkward alcove into useful storage without the cost of made-to-measure joinery. MDF or plywood sheets are relatively affordable, easy to work with and suitable for painting. The key is accurate measuring, sensible material choices and careful preparation.
Assess Your Alcove Dimensions
Measure the width at the front and back of the alcove, then repeat at several heights. Older walls are rarely perfectly square, so a shelf based on one measurement may fit at one end and leave a noticeable gap at the other.
Record the smallest width at each shelf position and subtract 2-3 mm to allow for fitting. Check the depth too, paying attention to skirting boards, sockets and any pipes. A cardboard template is useful when corners are uneven. Before cutting every shelf, make one test piece and check it in the alcove. Correcting a single panel is far cheaper than remaking the whole set.
Choosing Between MDF and Plywood
MDF has a smooth surface that takes paint well, making it a popular choice for shelves designed to blend into the surrounding walls. Standard 18 mm MDF works for many small and medium alcoves, although long shelves may need a thicker front edge or timber support to reduce sagging.
Plywood costs more but offers greater strength for its weight and has attractive layered edges if you prefer a natural finish. When you're ready to order, The Good Sheet supplies MDF boards, plywood sheets, timber and fixings, with cut-to-size options that can simplify preparation and reduce the need to handle full sheets at home. Check the material specifications and choose a board suitable for the intended use.
Essential Tools and Sturdy Fixings
You’ll need a tape measure, spirit level, pencil, drill, saw and sanding block. A combination square helps mark clean 90-degree lines, while clamps keep panels steady during assembly. Use a fine-toothed blade to limit chipping, particularly on plywood.
Choose wall fixings that suit the wall construction and the expected load. Masonry, plasterboard and stud walls require different plugs or screws. For a simple alcove shelf, secure timber battens along the back and sides, checking each one with a level before drilling. If shelves will hold heavy books or record collections, add a front rail or central support and keep spans modest.
Although fitting simple shelves can be a manageable DIY task, more complicated work may call for professional help. This guide to DIY jobs homeowners should never tackle themselves explains why recognising the limits of your skills can help prevent costly mistakes during home improvements.
Sanding and Priming for a Sleek Finish
Fill screw holes, small gaps and cut-edge imperfections with a suitable wood filler. Once dry, sand the surfaces with 120-grit paper, followed by 180 or 240 grit for a smoother result. Wipe away all dust before applying any coating.
MDF edges absorb paint quickly and can look rough unless sealed. Apply MDF primer or a dedicated edge sealer, then sand lightly after it dries. Two thin coats of primer usually create a better base than one heavy coat. Finish with durable furniture paint in satin or eggshell, allowing the recommended drying time between coats. Painting shelves before installation makes the broad surfaces easier to reach, though final touch-ups should wait until everything is fixed.
Styling the Finished Display
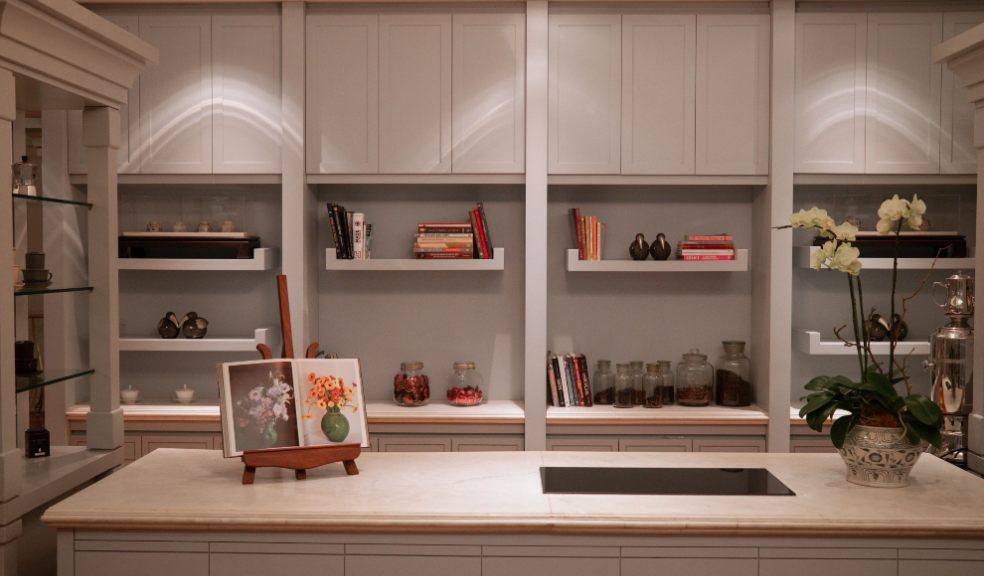
Allow the paint to cure fully before loading the shelves, as a dry surface can still mark under heavy objects. Start with the items you use most, placing them where they’re easy to reach. Books look less crowded when broken up with framed photographs, small plants or decorative boxes.
Leave some open space so the display doesn’t overwhelm the room. Baskets on lower shelves can hide cables, paperwork and everyday clutter, while matching storage boxes create a calmer look. If the alcove feels dark, fit a low-heat LED strip beneath one or two shelves and conceal the cable behind the front trim.
Take time over the final caulk line where the shelves meet the wall. That small detail closes fine gaps and gives the whole installation the crisp, fitted finish associated with bespoke joinery.
Collaborative post.